Custom Importer Setup
If your current SIS is not supported via a direct integration or if you would like to maintain a finer level of control over what data you send over, our Custom Importer is the perfect option.
Initial Setup
To get started, download the templates below:
Initial Setup
To get started, download the templates below:
Note: The file names must be exactly the same (case-sensitive) and the headers must be left as-is. If you change the header row, your data will not be imported properly.
Each subsequent row is required to have the same number of columns as the header, but most fields can be left blank if you'd like. The only fields that are strictly required are any ID fields as they are what we use to form relations with your data.
With this in mind, please setup your SIS to export the desired data in the specified formats according the the templates or script appropriately.
Configuring the Edlio Integration
Once your data is formatted all nicely, we can move on to the Edlio side of things and configure your SIS settings:
Once your data is formatted all nicely, we can move on to the Edlio side of things and configure your SIS settings:
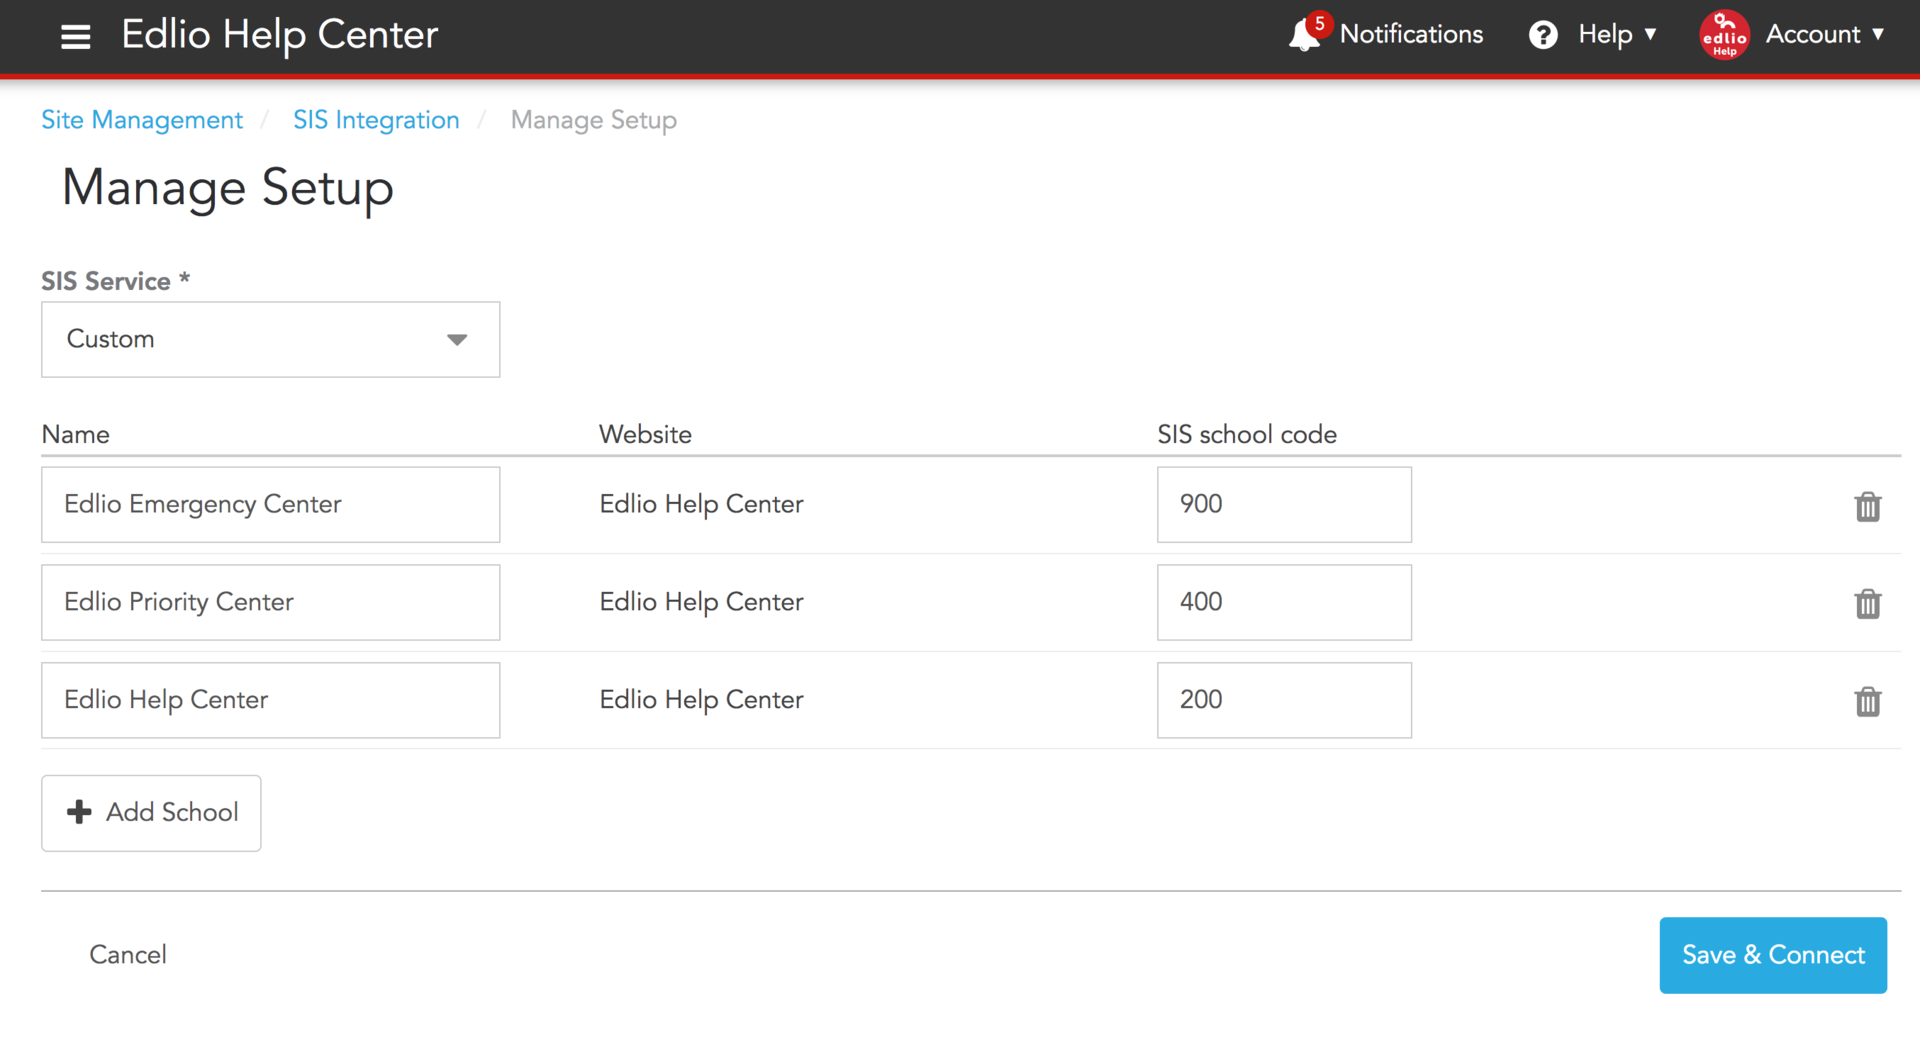
After selecting custom, you can add as many schools as you need and assign them to their appropriate websites using the dropdowns. The SIS school code column on this screen will be used to match data from the SchoolId column in the CSVs you created.
Once you save your configuration, you should be brought to the sync screen:
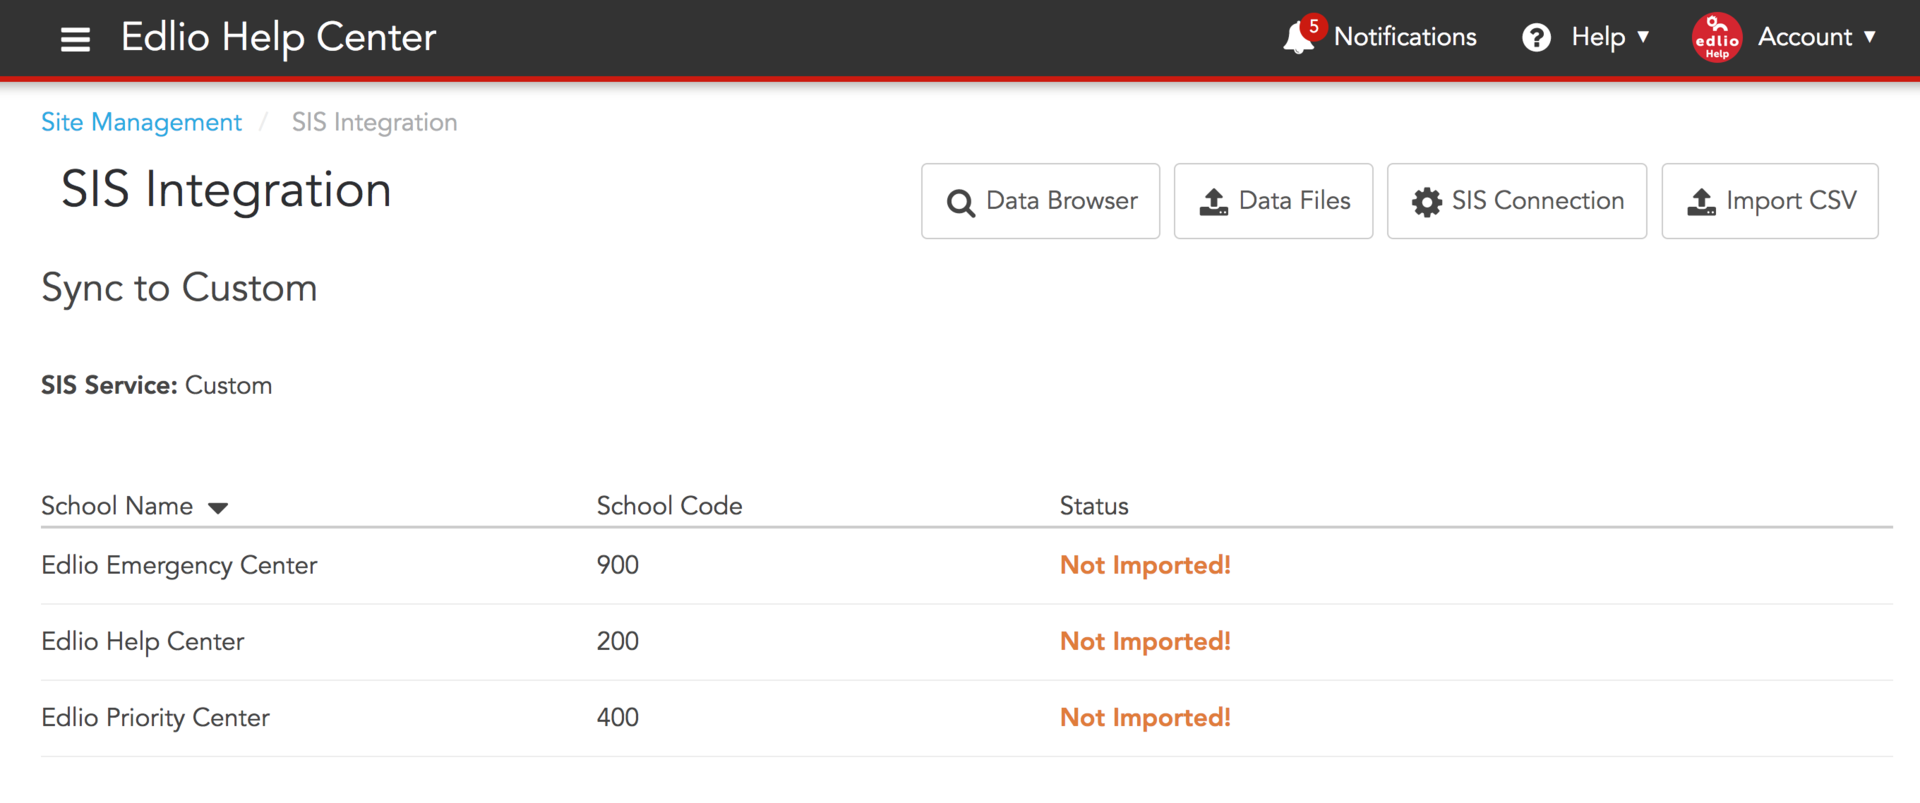
From here, we want to click "Import CSV" and move onto the CSV upload screen:
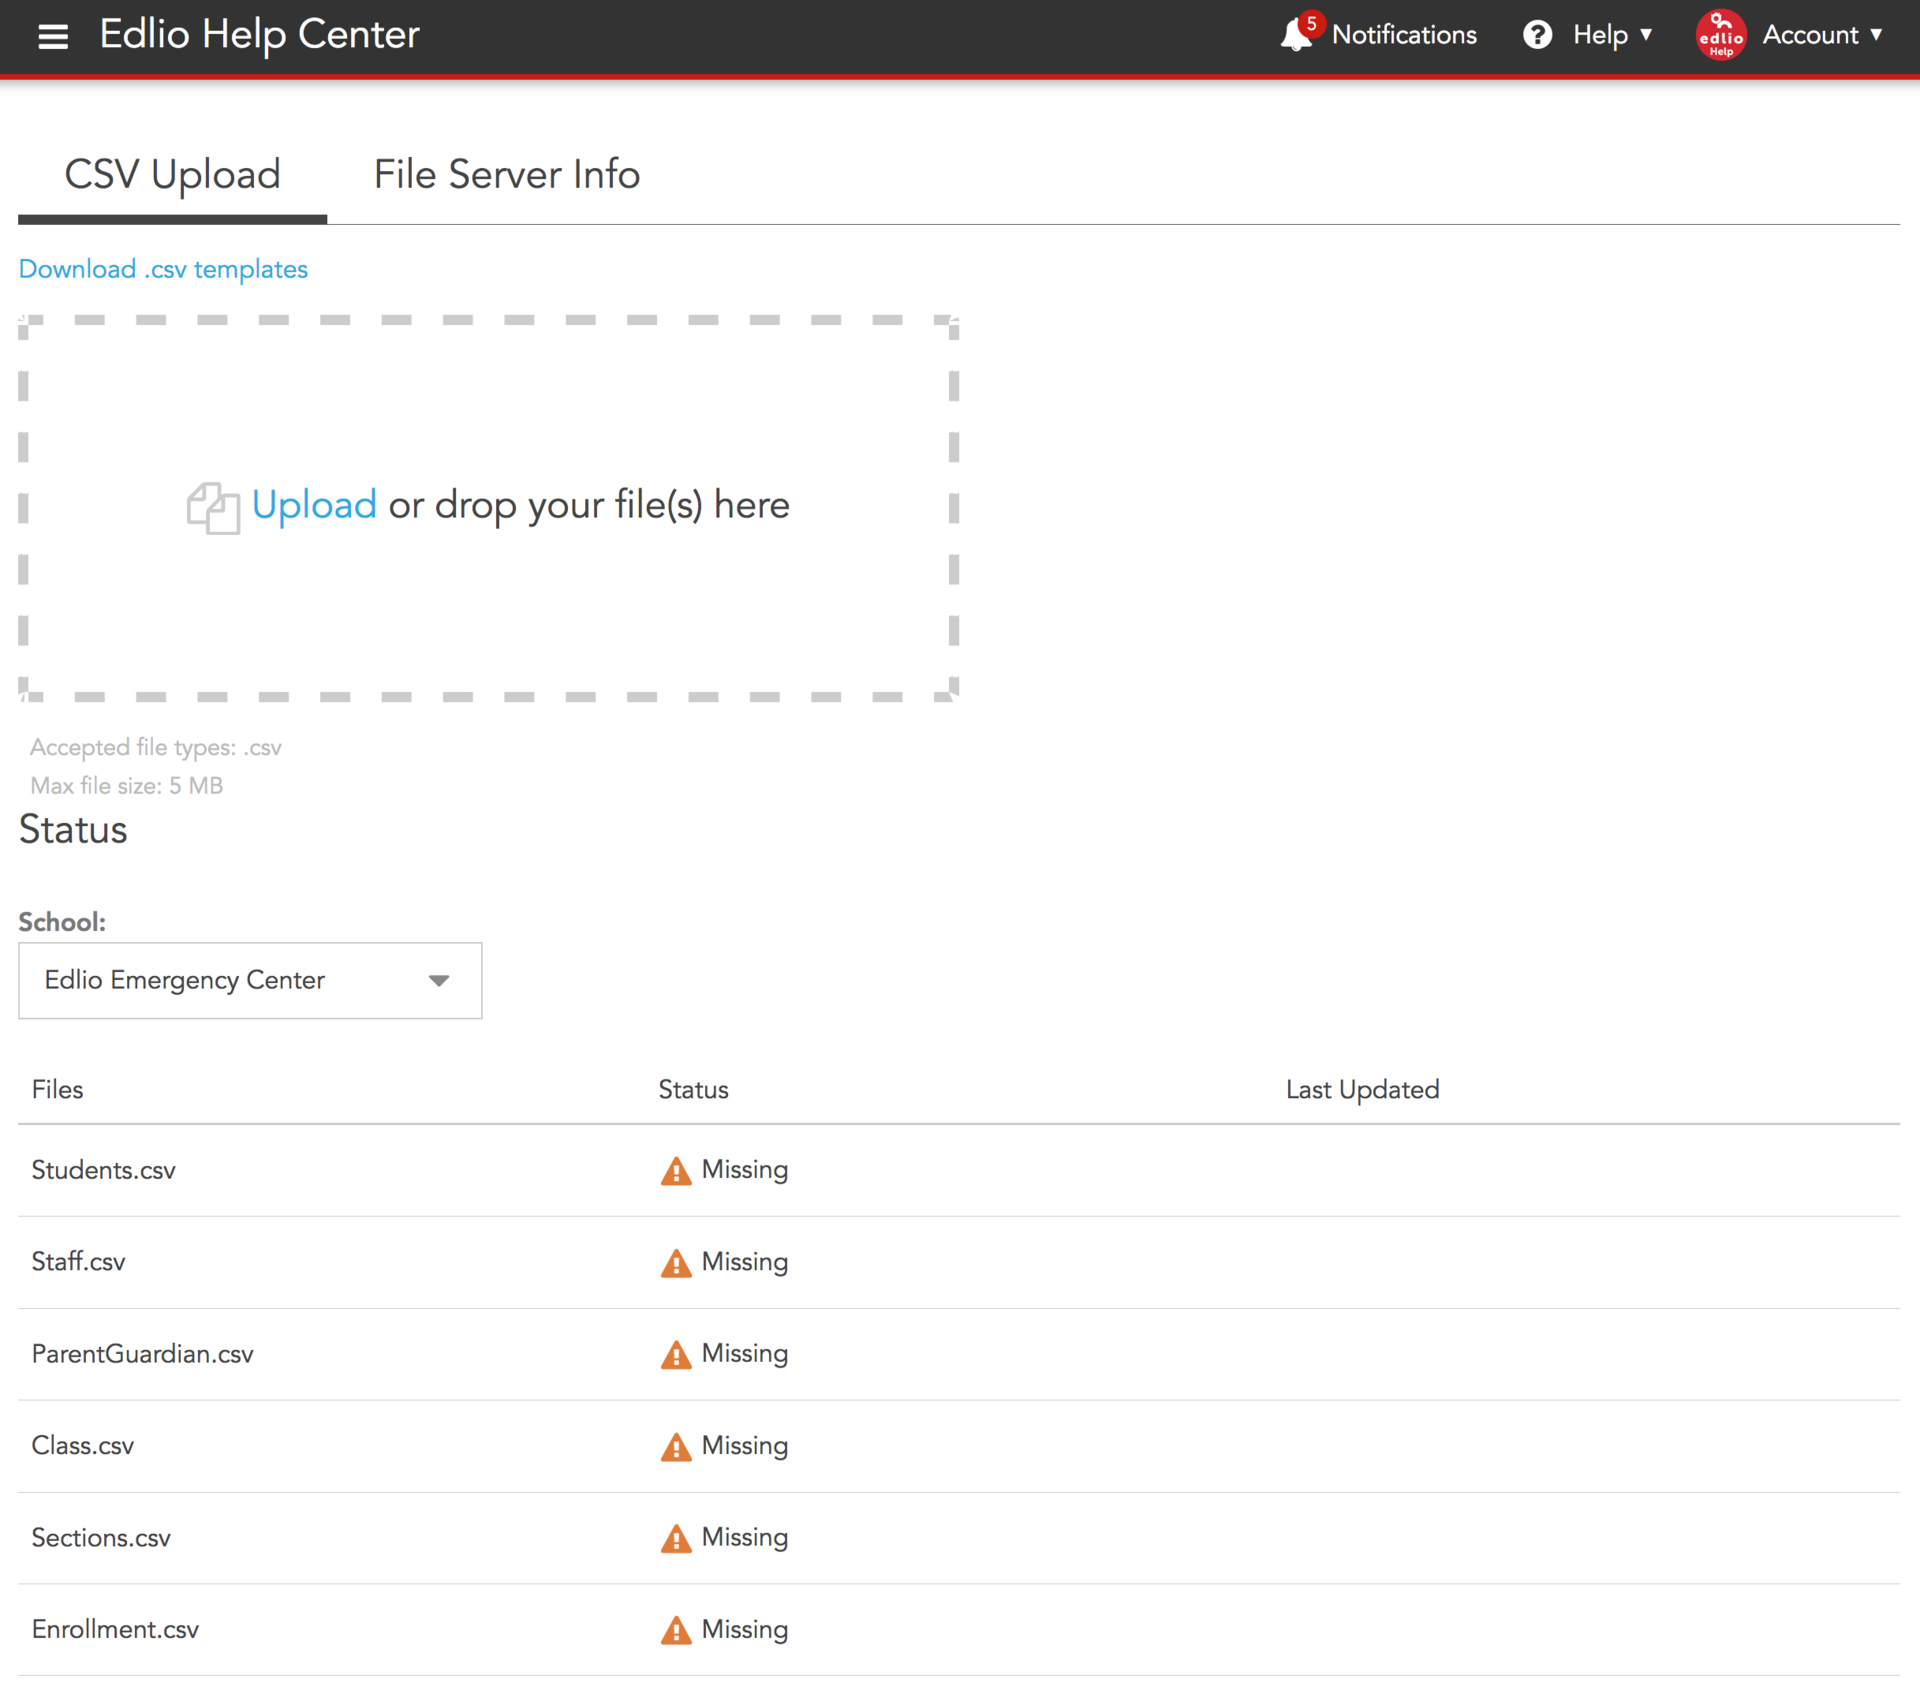
From here you can upload your CSVs through the UI and watch them sync to your schools. After dropping in a file, it may take a few minutes or so for your school to finish syncing. Once every file shows as successful, your data has been fully imported!
Setting up FTP
While uploading the CSVs through the UI is convenient for our testing purposes, it's quite tedious to do every single time there is a change in the SIS data. To remedy this, we can use FTP to automate the process!
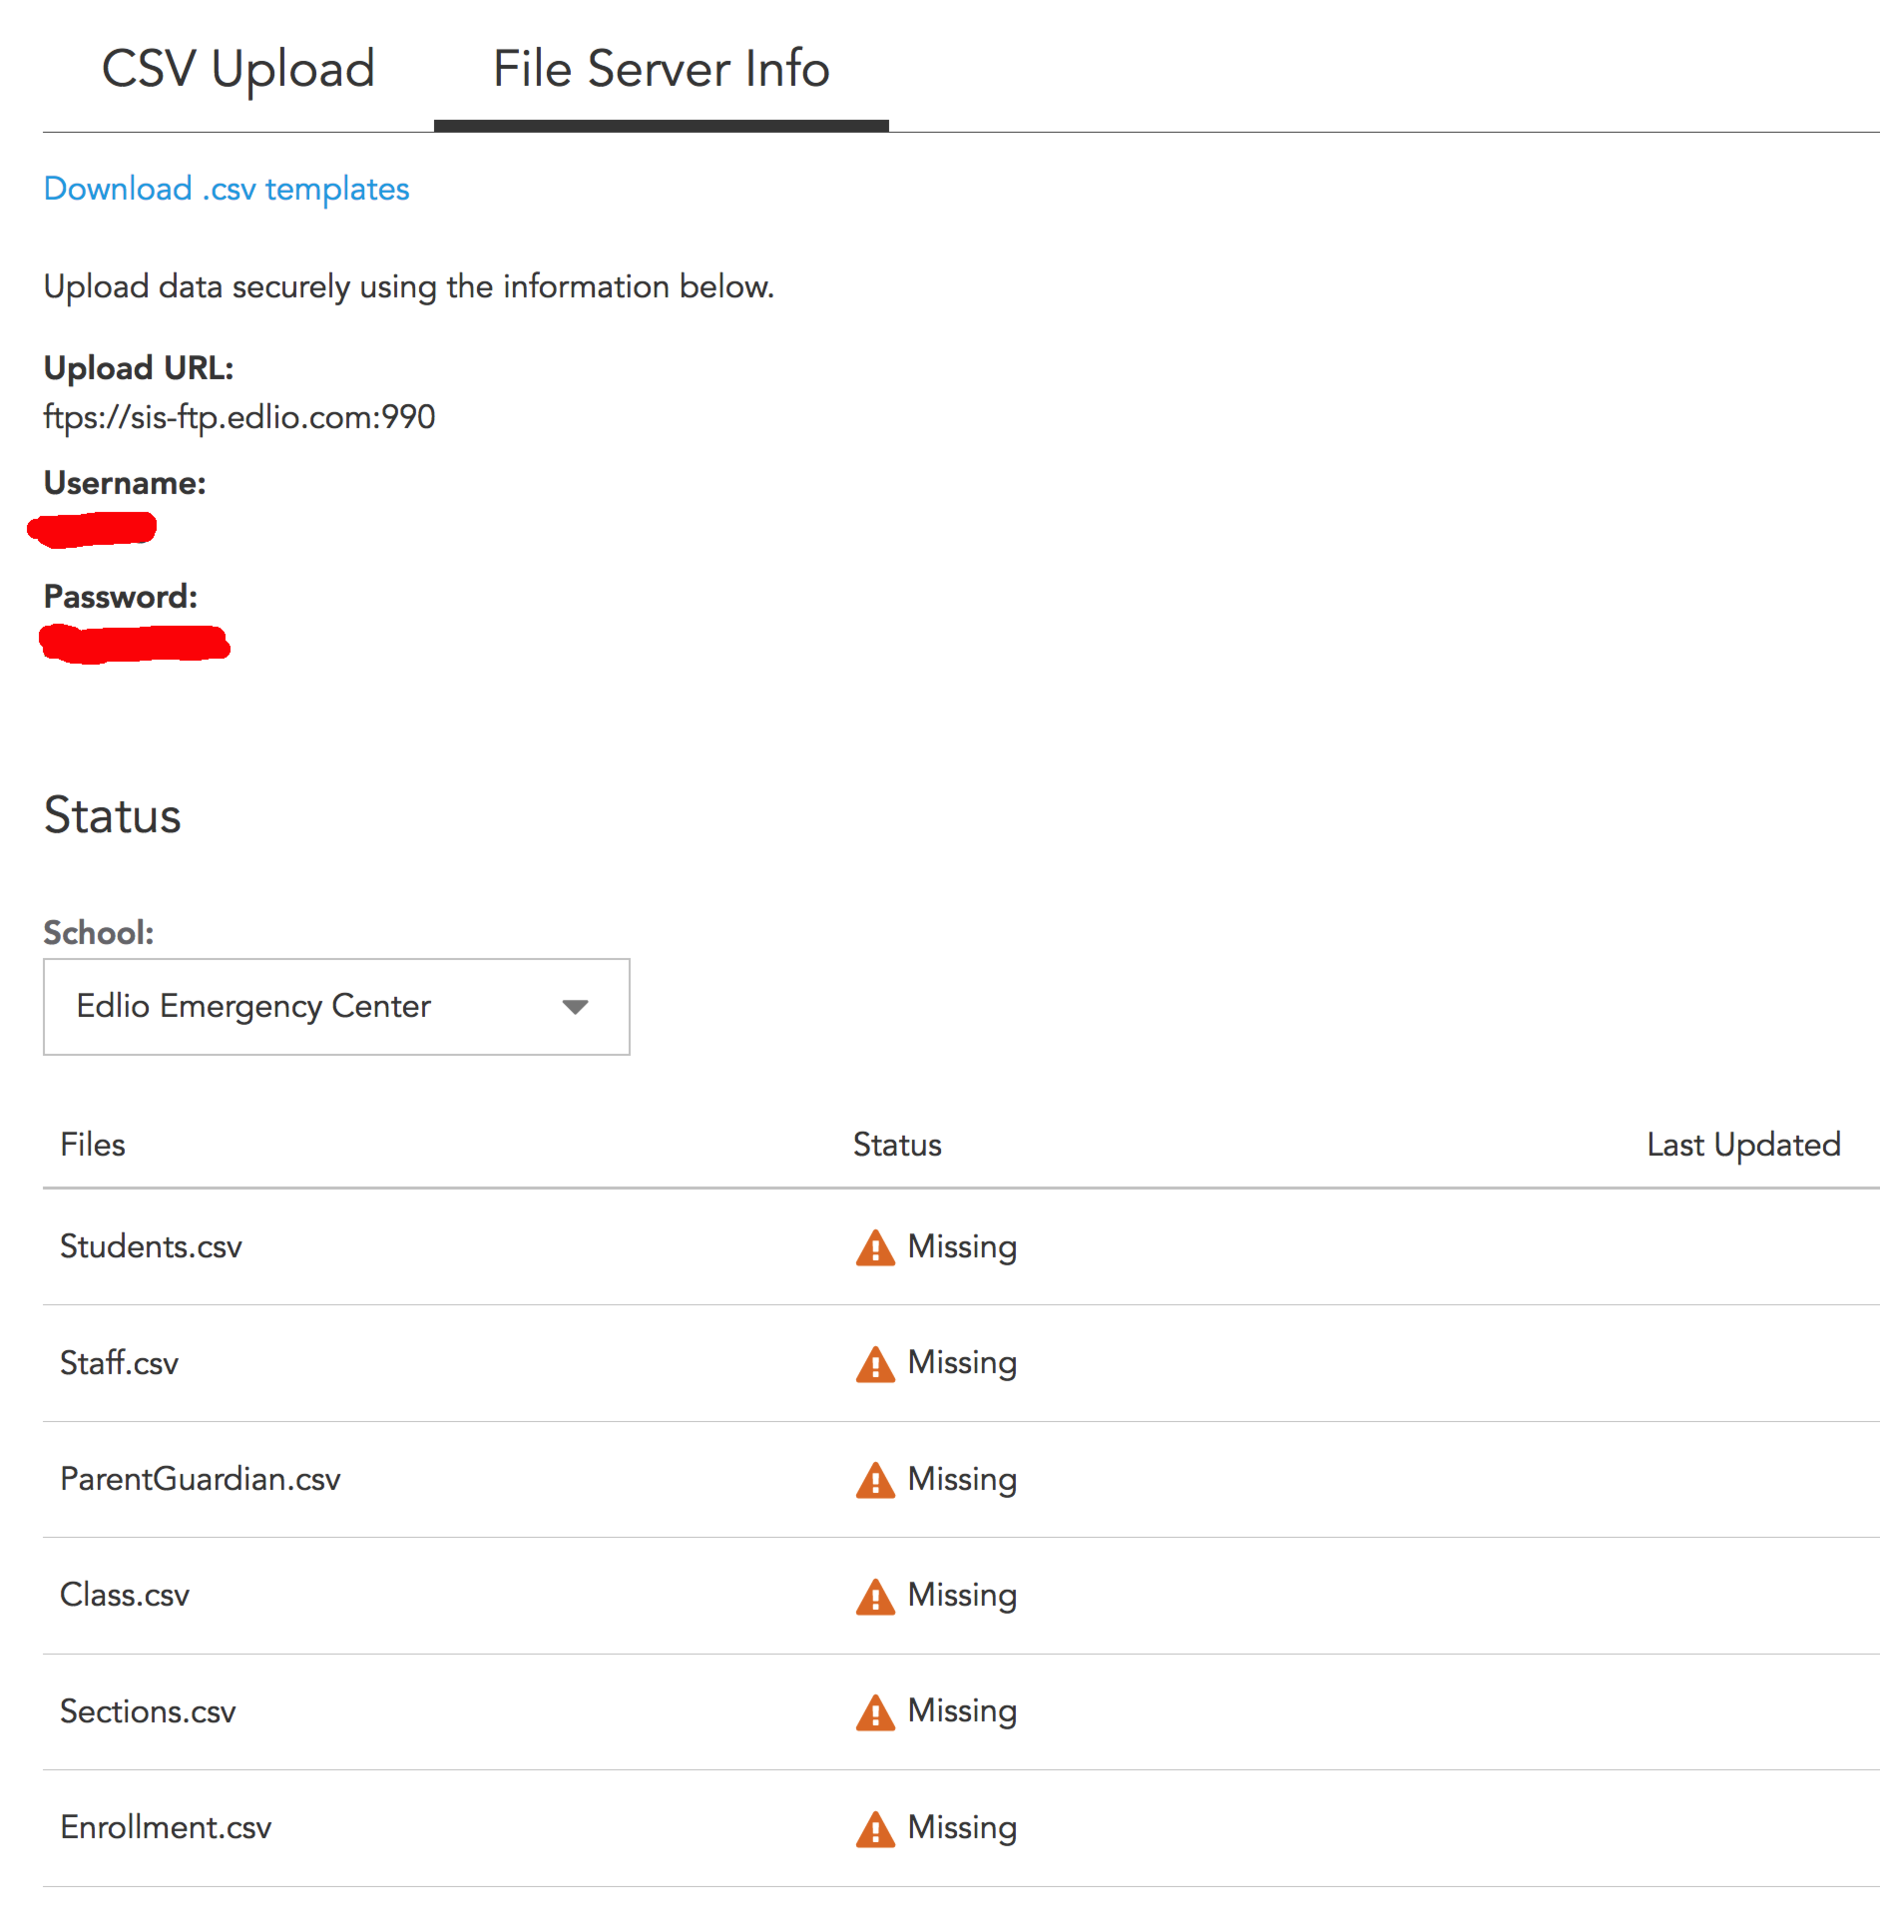
On the CSV upload screen, switch tabs to "File Server Info":
While uploading the CSVs through the UI is convenient for our testing purposes, it's quite tedious to do every single time there is a change in the SIS data. To remedy this, we can use FTP to automate the process!
On the CSV upload screen, switch tabs to "File Server Info":
You can take the credentials generated for you on this screen and connect using FileZilla, WinSCP, or your favorite FTP client.
Here is what that would look like in PowerSchool's UI, for example:
Here is what that would look like in PowerSchool's UI, for example:
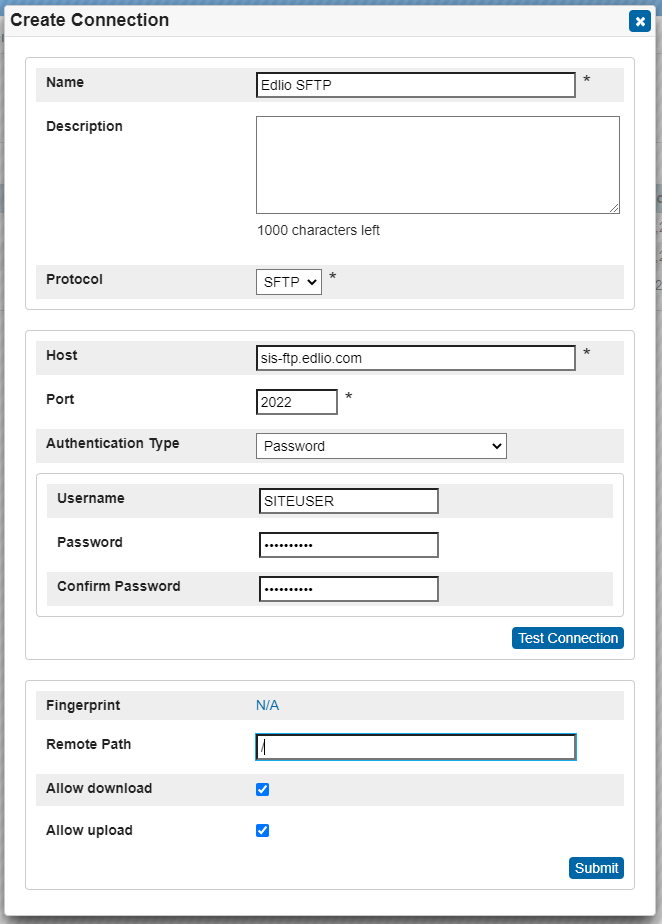
If you are unable to connect to ftps://sis-ftp.edlio.com:990, you can also use: sftp://sis-ftp.edlio.com:2022
Once you are able to connect, try uploading the CSVs from your client:
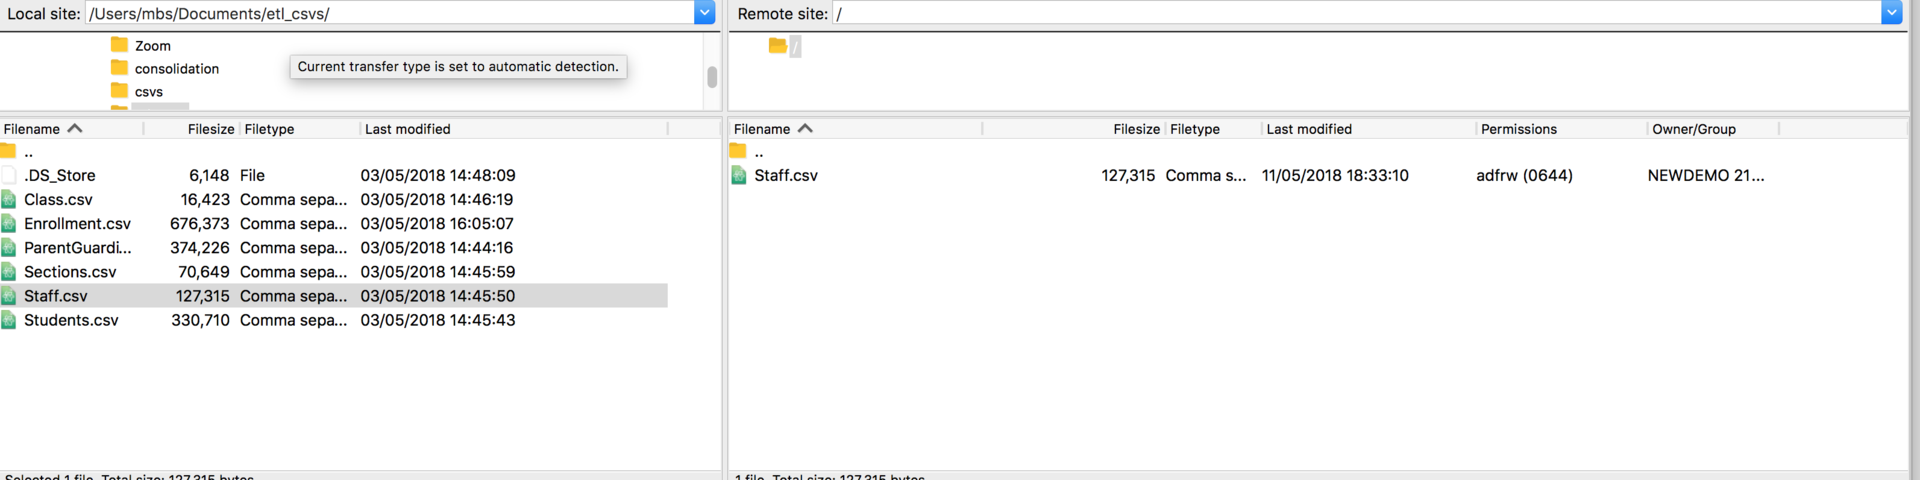
After about a minute, you should see the file disappear from the server-- this means we've picked it up for processing.
Just like the web UI uploads in the previous section, you can monitor the sync status on the CSV Upload or File Server Info screen.
From here you can either automate your uploads through your client or by setting up some local scripting.
Just like the web UI uploads in the previous section, you can monitor the sync status on the CSV Upload or File Server Info screen.
From here you can either automate your uploads through your client or by setting up some local scripting.
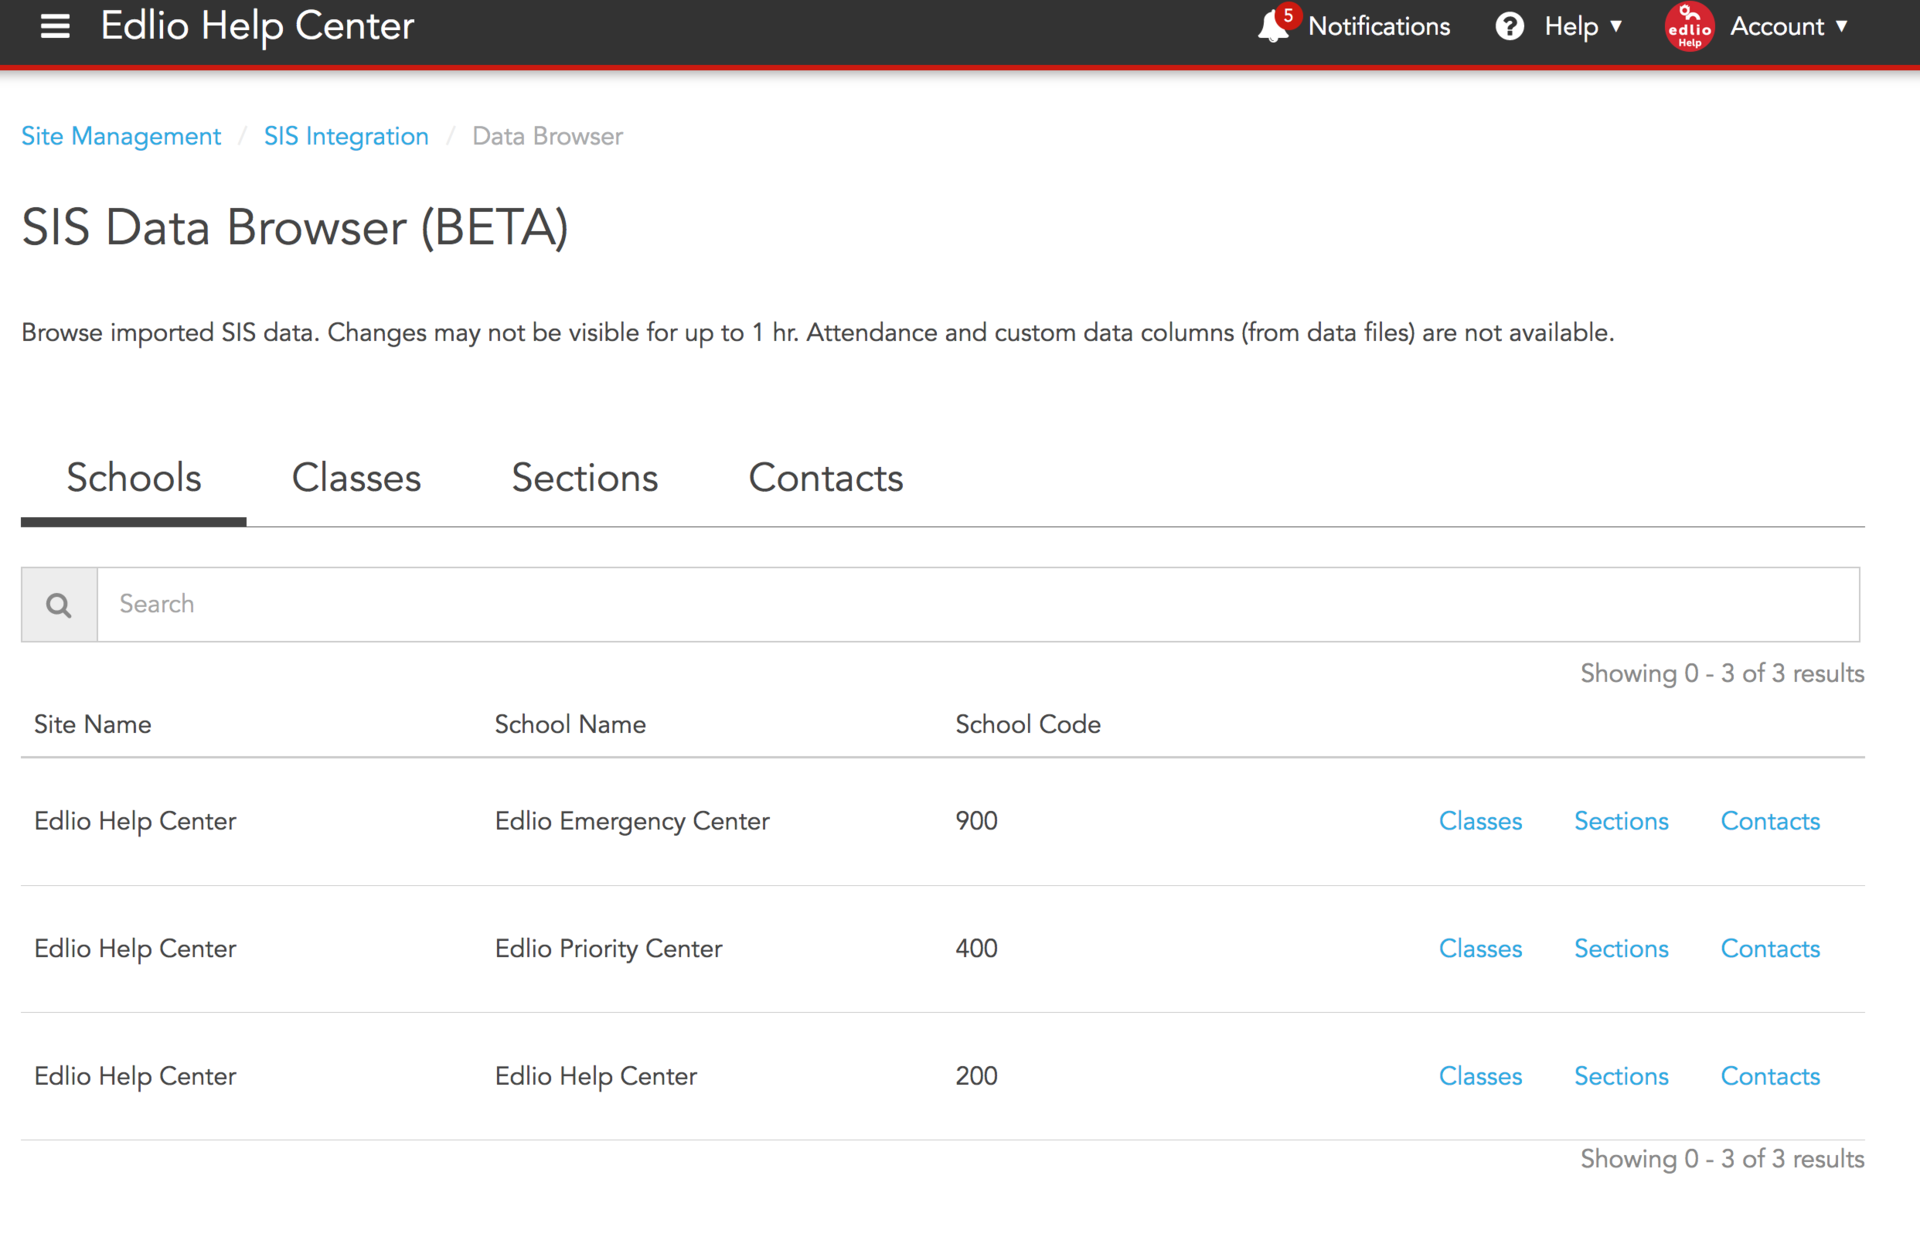
Confirming Your Data
After your data is imported, you can browse everything we've imported via the data browser: