Setup Broadcasts
Social Media channels such as Twitter, Facebook, and Instagram can be setup from the Social Media settings.
1. Navigate to settings and go to Broadcasts settings.
2. Setup default channels
If you are only using some of the available channels for most of your Broadcasts, set those channels as default to reduce the number of steps when creating a new Broadcast.
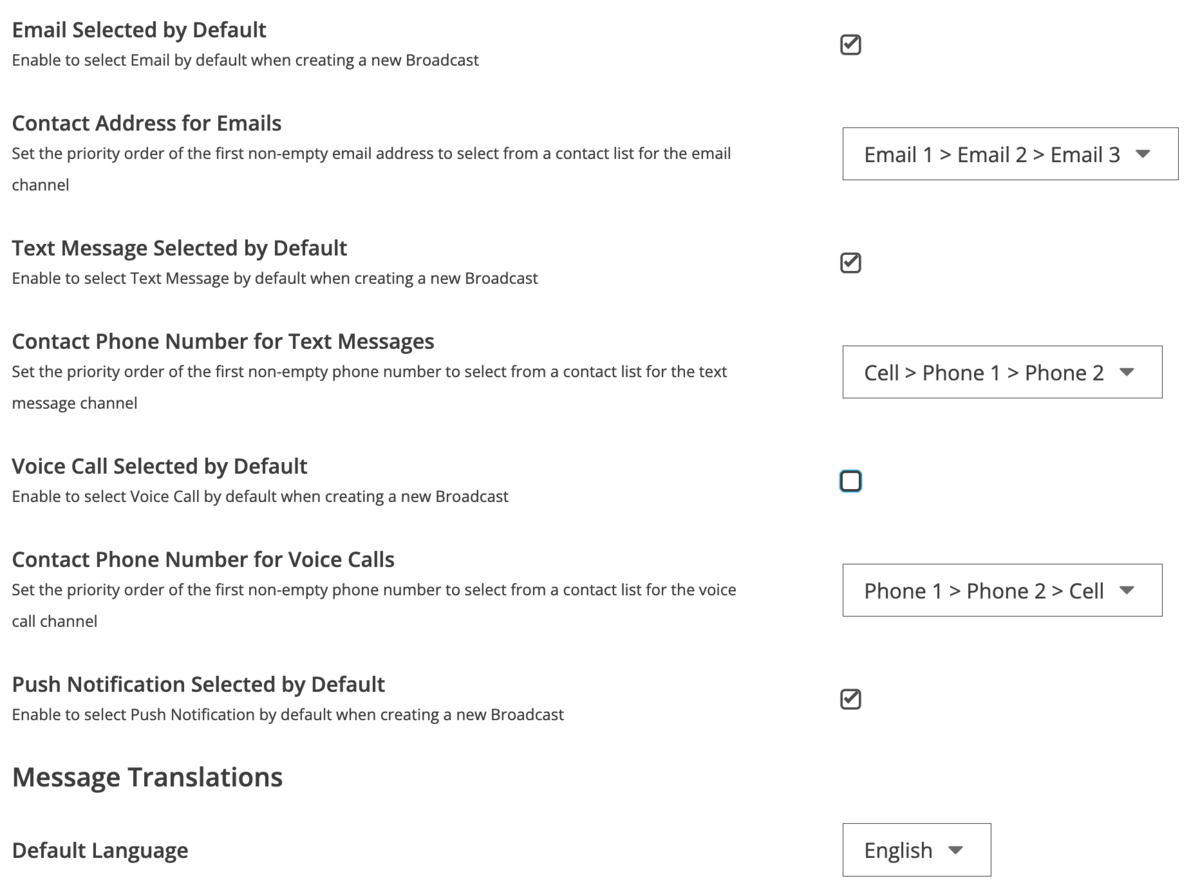
The channels available to set by default will vary depending on the channels your school has purchased.
Select the channels you would like to be enabled by default and click Save to save your changes.
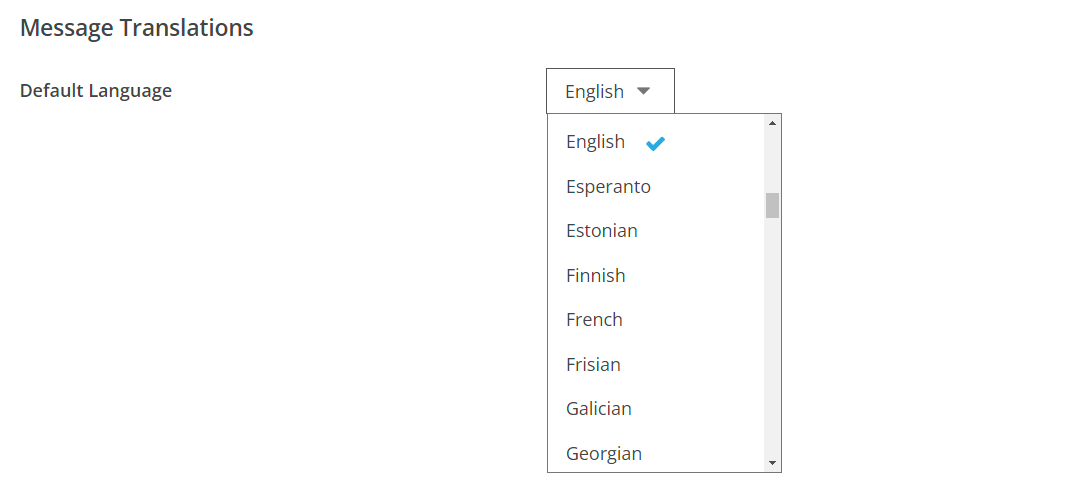
3. Setup Default Language
Select the default language that will be used for each Broadcast. The selected language will be used as the main language by default when creating a new Broadcast. You can always override the main language used while creating or editing a Broadcast.
4. Setup Email Addresses
If you have the Broadcasts Email channel available, you must verify at least one email address that the Broadcast will be sent from. If you verify multiple email addresses, you will be able to choose which email address a Broadcast will be sent from.
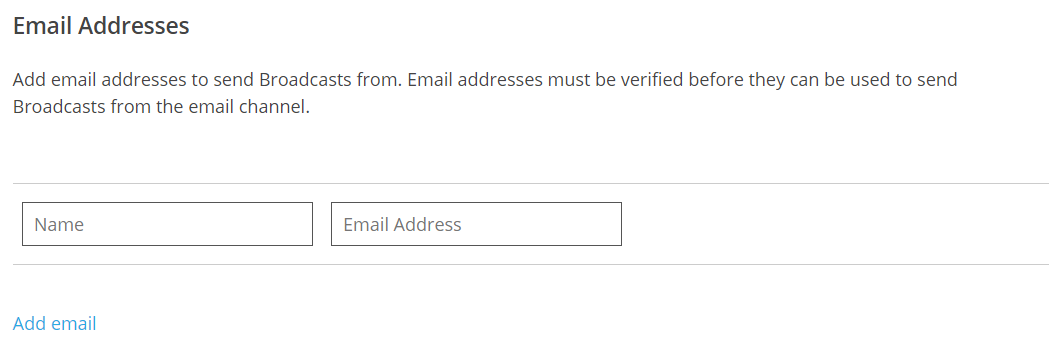
Enter the Name and the Email Address you would like to use when sending Broadcasts.
Click Save to save your changes. You will receive a verification email shortly.
The name you enter here only changes how your name appears in the emails you send in Broadcasts. It does not affect emails you send in other features in Edlio or emails sent by your email provider.
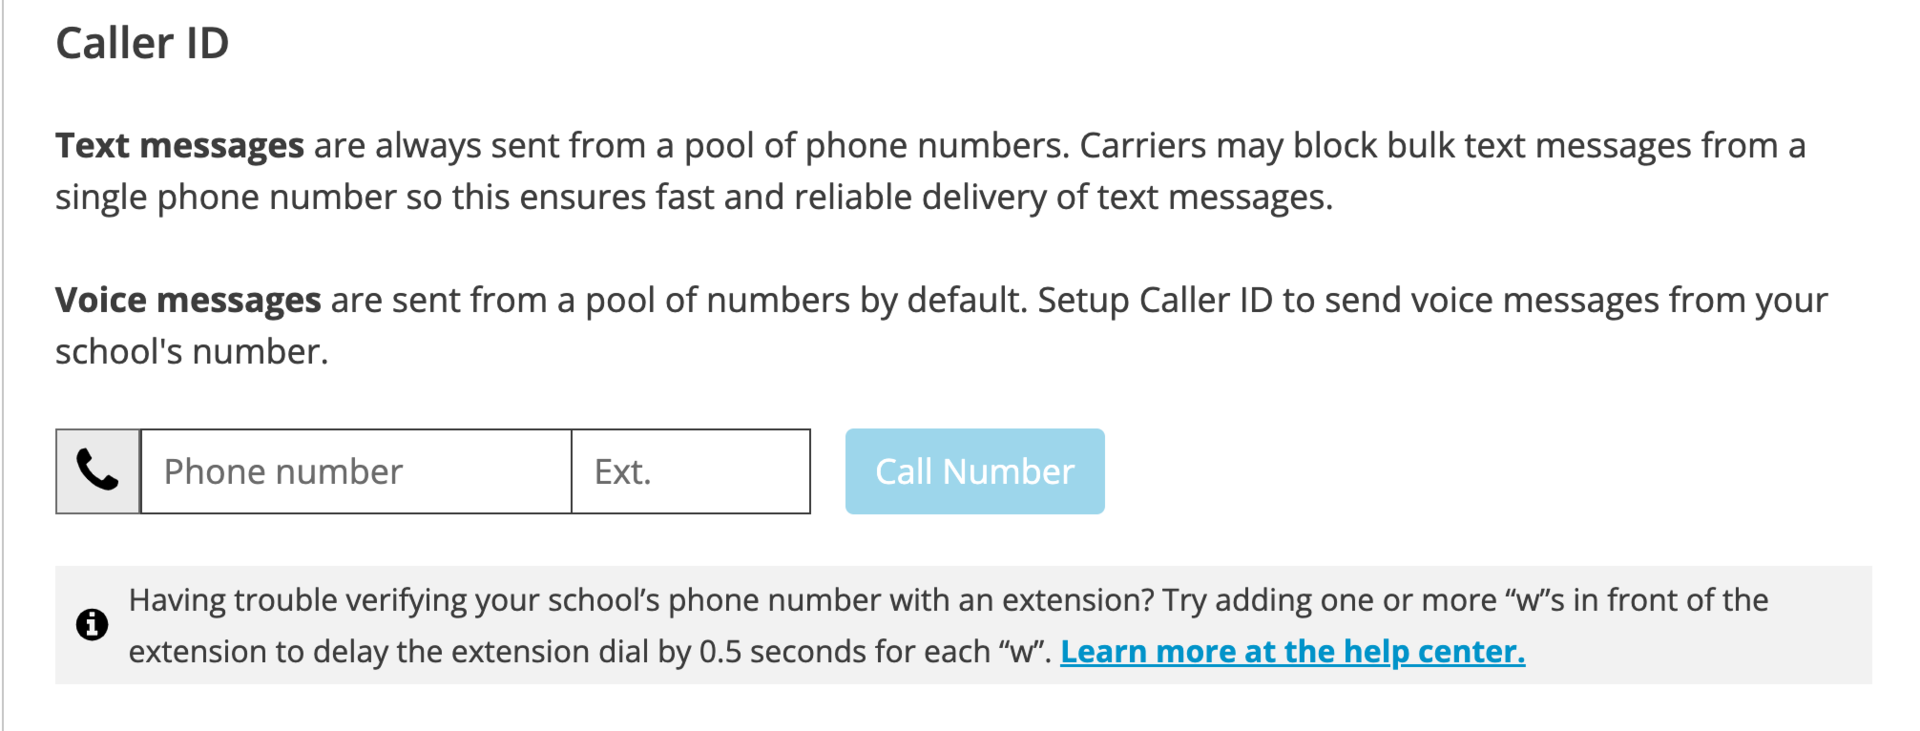
5. Setup Caller ID
If you have the Broadcasts Voice channel available, you can optionally setup Caller ID. Once Caller ID is setup, all Broadcast voice calls will appear to be sent from the number you have specified.
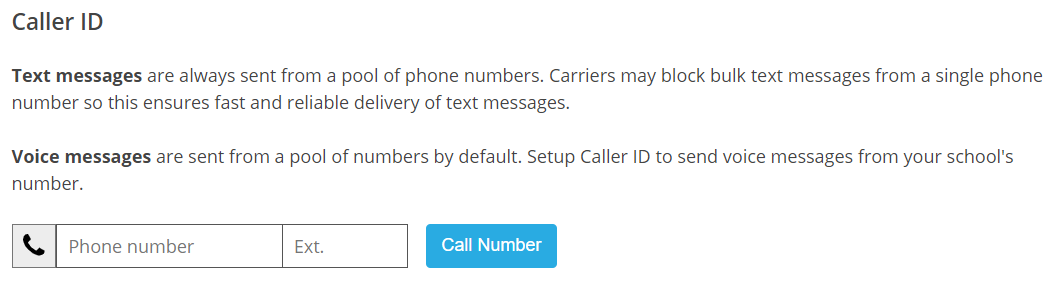
Enter the phone number you would like all Broadcast voice calls to be sent from and click Call Number to begin verification.
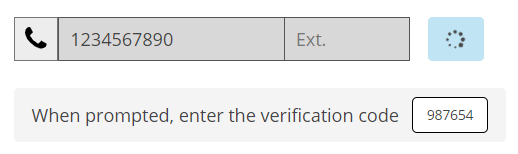
Once you receive the verification call, enter the verification code that appears to complete the process.

The verified number will be configured and all Broadcast voice calls will now be sent from this number.
If you experience issues using your school extension, try adding "w"s in front of the extension number to delay the extension dial. We recommend adding about six "w"s for a 3-second delay.